

Owning a historic home is often described as a labor of love, but any seasoned preservationist will tell you that the emphasis usually falls heavily on the “labor.” There is an undeniable romance to walking through halls that have stood for a century or more, admiring the craftsmanship of a bygone era, and feeling the weight of history in the floorboards. However, the reality of renovating such a property is far less romantic. It is a complex, high-stakes logistical challenge that requires more than just a general contractor and a vision. It requires a curated team of highly specialized experts.
When you purchase a new build, you are paying for the materials and the location. When you purchase a historic home, you are often paying for the privilege of undoing decades of deferred maintenance, questionable DIY “fixes” from previous owners, and the natural degradation of materials that were never meant to last forever. The standard general contractor, while invaluable for managing the timeline and broad strokes of the project, often lacks the niche expertise required to handle the idiosyncrasies of pre-war construction.
A generalist might look at a crumbling stone foundation and suggest a concrete patch, unaware that the modern mixture will destroy the lime mortar originally used. They might see old wiring and suggest a quick splice, missing the fire hazard hidden behind the lath and plaster. To truly steward a historic property, you must build a roster of specialized tradespeople who understand the science and art of preservation.
This guide explores the specific types of specialized contractors you need to know. These are not the professionals you call for a simple kitchen remodel; these are the experts you bring in to ensure the very bones of the house are safe, stable, and ready for another century of life. From mitigating hazardous materials to restoring intricate aesthetic details, this is your roadmap to assembling the ultimate renovation team.

Identifying and Mitigating Toxic Materials
Before any walls are opened or any demolition begins, the first and most critical step in a historic renovation is ensuring the environment is safe. Homes built prior to the 1980s, and especially those from the Victorian or Edwardian eras that saw mid-century updates, are frequently host to a variety of hazardous materials. The most notorious of these are lead and asbestos. While lead paint is commonly understood, asbestos remains a hidden killer, often lurking in pipe insulation, floor tiles, roofing materials, and even textured paints.
The danger of asbestos is not in its presence, but in its disturbance. As soon as you begin to tear out old ductwork or rip up 1950s linoleum to reveal the hardwood underneath, you risk releasing microscopic fibers into the air. These fibers, when inhaled, can cause severe long-term health issues. This is why you cannot simply hire a demolition crew and hope for the best. You must prioritize environmental safety above all else.
The Role of Environmental Testing
Before you sign a contract with a builder, you need to engage a specialist for asbestos testing. These professionals conduct a comprehensive survey of the property, taking samples from various materials that are suspected to contain hazardous fibers. It is a forensic process; they will examine the layers of flooring, the wrapping around steam pipes, and the composition of old ceiling tiles.
If the testing comes back positive, the remediation process must be handled by a licensed abatement team, not your general contractor. They will set up containment zones with negative air pressure to ensure that no contaminants escape into the rest of the house. This step is non-negotiable. Ignoring it not only endangers your family and your workers but can also lead to significant legal liabilities and fines.
Key Areas to Test in Historic Homes:
- Thermal Insulation: often found wrapped around boilers and steam pipes in the basement.
- Vinyl Floor Tiles: Specifically, 9-inch by 9-inch tiles from the mid-20th century.
- Vermiculite Insulation: often found in attics.
- Glazing Compound: Used in old windows.
Upgrading Electrical Systems for Modern Loads
Once the home is deemed environmentally safe, the next hurdle is usually the mechanical systems. Historic homes were built in an era before the refrigerator, let alone the server rack, EV charger, or central HVAC system. The electrical demands of a modern household are exponentially higher than what a 1920s knob-and-tube system was designed to handle.
Many historic homes still rely on outdated service panels (often 60 or 100 amps) and wiring that lacks a ground wire. While a standard residential electrician can swap out outlets and install light fixtures, a full rewire of a large historic estate—especially one that might be repurposed for commercial use or high-end modern living—requires a higher level of expertise.
Why Heavy-Duty Expertise Matters
For extensive renovations, particularly in large manor houses or properties being converted into Bed & Breakfasts, you may find that residential electricians are overwhelmed by the scope. In these instances, it is often wiser to hire commercial electrical contractors. These professionals are accustomed to dealing with higher voltages, complex conduit runs, and the rigorous code requirements of large-scale systems.
Commercial-grade electricians bring a different discipline to the job. They are experts in load calculation, ensuring that your new heat pumps, induction cooktop, and sauna don’t trip the main breaker every time they run simultaneously. Furthermore, fishing wires through lath-and-plaster walls without destroying the historic fabric of the home is an art form. Experienced contractors know how to navigate the voids in double-wythe brick walls and traverse intricate floor joist systems with minimal invasiveness.
Planning Your Electrical Upgrade:
- Service Upgrade: Moving from 100 amps to 200 or 400 amps is almost always necessary.
- Smart Home Integration: Hardwiring for data and security should be done while walls are open.
- Period-Appropriate Lighting: You need pros who can install modern wiring for antique fixtures.

Sealing the Structure from the Ground Up
Water is the single greatest enemy of any building, but it is particularly devastating to historic structures. Older homes often sit on foundations made of fieldstone, brick, or rubble, held together with lime mortar. Over time, the hydrostatic pressure from the surrounding soil can force water through the masonry, leading to damp basements, rot, and eventually, structural instability.
A general contractor might suggest applying a waterproof paint to the interior walls, but this is often a mistake in historic homes. It traps moisture inside the stone, causing the masonry to spall (flake off) when it freezes and thaws. Instead, you need specialists who understand the dynamics of water management.
Managing Foundation Moisture
To truly protect your investment, you should consult basement waterproofing companies that have specific experience with historic foundations. The goal is not just to stop the water from getting in, but to manage the water that is already there. This often involves exterior solutions, such as excavating around the foundation to install a proper drainage plane and French drains, or interior solutions like channeling water under the slab to a sump pump system.
These companies understand that the basement of a historic home is not a watertight submarine; it is a breathing system. They will use membranes and drainage mats that relieve hydrostatic pressure rather than trying to hold it back with rigid coatings that will inevitably fail.
Remedying Rot and Long-Term Leaks
If water has been entering the home for years—perhaps through a leaky slate roof or a failed gutter—there is likely significant damage to the wooden structure. This goes beyond simple cosmetic staining. Long-term water intrusion can rot structural beams, destroy antique plaster, and create an environment ripe for mold.
When you discover “spongy” floors or crumbling drywall, you need more than a carpenter; you need water damage restoration services. These specialists do more than just dry out the area. They assess the structural integrity of the affected wood and determine what can be saved and what must be replaced. In a historic home, the goal is preservation. A restoration expert will have techniques to dry out rare hardwood floors or treat structural timbers with borate solutions to stop rot in its tracks, saving you from having to replace impossible-to-match materials.
Signs You Have Foundation Issues:
- Efflorescence: A white, powdery mineral deposit on basement walls.
- Musty Odors: Indicating persistent dampness and potential mold.
- Step Cracks: Stair-step cracks in brick or masonry walls.
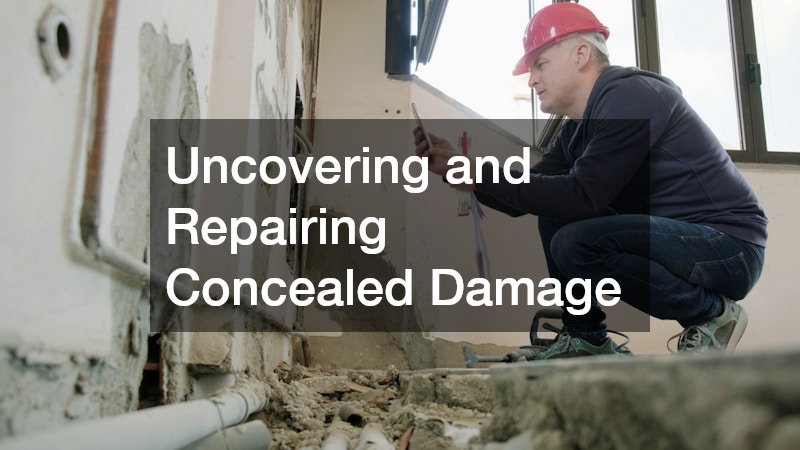
Uncovering and Repairing Concealed Damage
Every historic home has a history, and not all of it is pleasant. Over the course of 100 years, a house may have survived small kitchen fires, chimney fires, or localized flooding. Previous owners, lacking the funds or technology for proper restoration, may have simply covered up the damage. It is not uncommon during a renovation to pull down 1970s wood paneling only to find charred studs or smoke-stained plaster underneath.
This “legacy damage” presents a unique challenge. While the structure might be stable, the lingering effects of smoke and soot can permeate the porous materials of the house, releasing odors whenever the humidity rises or the house heats up.
Dealing with Soot and Smoke
If you uncover evidence of past fires, standard cleaning methods will not suffice. You need to bring in professionals who specialize in fire damage restoration. These experts possess the chemical knowledge to neutralize the acidic residues left by smoke, which can corrode metal and deteriorate fabric over time.
They employ techniques such as thermal fogging and ozone treatment to penetrate the pores of wood and plaster, eliminating the odor at the molecular level. More importantly, they can apply specialized encapsulants to charred but structurally sound timbers, sealing in the carbon and preventing the smell from ever returning. This allows you to keep the original framing of the house without the ghost of a past fire haunting your new living room.
Handling Comprehensive Disaster Histories
Sometimes, the damage is a complex interplay of elements. A fire in the 1940s might have been extinguished with thousands of gallons of water, leading to a combination of charring and deep-seated rot. Or perhaps a river flood inundated the first floor decades ago, and the silt was never properly removed from the wall cavities.
In these complex scenarios, you need a contractor versed in flood and fire damage restoration. These dual-threat experts understand how these forces interact. For example, water used to fight a fire can cause wood to swell and buckle, complicating the structural repairs needed for the fire damage. They approach the remediation holistically, ensuring that solving one problem (like drying the wood) doesn’t exacerbate another (like spreading soot particles through air movers).
Why “Covering Up” is Never the Answer:
- Odor Return: Smells will eventually bleed through paint and drywall.
- Health Risks: Old soot can contain carcinogens.
- Resale Value: Inspectors will eventually find concealed damage, killing your sale.

Ensuring Clean and Reliable Water Sources
While we often focus on the house itself, the infrastructure supporting the property is equally vital. Many historic homes, particularly farmhouses and country estates, are located in areas that are not served by municipal water. They rely on private wells. However, the well that served a family in 1920 is unlikely to meet the standards—or the volume demands—of a modern family in the 2020s.
Old “dug wells” (shallow pits lined with stone) are charming but are highly susceptible to surface contamination from agricultural runoff, septic failure, and bacteria. Even older drilled wells may have steel casings that have rusted through, allowing sediment and contaminants to enter the water supply.
Assessing Old Infrastructure
If your historic renovation involves a property on well water, one of your first calls should be to a local well driller. This is not just about digging a new hole in the ground. An experienced driller can inspect the existing system to determine if the well depth is sufficient and if the recharge rate (how fast water returns after use) can handle modern showers and dishwashers.
In many cases, they may recommend decommissioning the old, unsafe well and drilling a new one to a much greater depth to access a cleaner, more reliable aquifer. They also handle the installation of modern filtration systems and constant-pressure pumps, ensuring that your shower on the third floor doesn’t turn to a trickle when the garden hose is on. Water quality is a health and safety issue that cannot be overlooked in the pursuit of aesthetic perfection.
Well System Checklist:
- Water Quality Test: Test for bacteria, nitrates, arsenic, and heavy metals.
- Flow Rate Test: Ensure the well produces enough gallons per minute (GPM).
- Equipment Inspection: Check the age and condition of the pressure tank and pump.
Preserving the “Jewelry” of the Home
Once the safety, structural, and mechanical hurdles are cleared, the renovation turns to the elements that give the home its soul: the architectural details. In historic homes, the windows and the metalwork are the “jewelry” that catches the eye. Unfortunately, these are also the first things that flippers and inexperienced renovators try to replace with cheap, modern alternatives.
Preservationists argue that replacing original wood windows with vinyl is a cardinal sin. The tight grain of old-growth wood can last indefinitely if maintained, whereas vinyl has a lifespan of 20-25 years. However, restoring these elements requires a level of craftsmanship that is rare in the general construction market.
The Art of Stained and Leaded Glass
Many Victorian, Tudor, and Craftsman homes feature stunning stained or leaded glass windows. Over time, the lead “came” (the metal strips holding the glass) can oxidize and become brittle, causing the window to bow or leak. The glass itself may be cracked or covered in decades of grime.
Do not ask a regular window contractor to fix these; they will likely suggest tearing them out. Instead, you must find church window restoration companies. While their primary clientele might be ecclesiastical institutions, these artisans are the true masters of leaded glass. They can carefully disassemble the window, clean every piece of glass, re-lead the panel using fresh metal, and cement it to be weather-tight. They can often match broken glass with antique salvage to ensure the repair is invisible. This service is an investment, but it preserves a feature that is literally irreplaceable.
Refinishing Metalwork and Hardware
Historic homes are often filled with durable, high-quality metal features: cast iron radiators, intricate vent covers, wrought iron fencing, and solid brass door hardware. Over the years, these items get painted over repeatedly, obscuring the crisp details of the casting under globs of latex.
Stripping these items by hand is a nightmare and often yields poor results. A better solution is to remove the metal elements and take them to local powder coating companies. These shops can sandblast the metal to bare steel or iron, removing 80 years of paint and rust. They then apply a powder coat finish—a dry powder that is electrostatically applied and cured under heat. The result is a finish that is tougher than conventional paint and looks brand new. This is particularly effective for restoring cast iron radiators, turning them from eyesores into architectural features.
Items Ideal for Powder Coating:
- Radiators: Restore heat efficiency and aesthetics.
- Vent Registers: Bring out the ornate scrollwork.
- Outdoor Furniture: Revive vintage wrought iron patio sets.
- Gate Hardware: Protect hinges and latches from the elements.

Blending Indoor and Outdoor Spaces
One of the few criticisms of historic architecture is that it often lacks the indoor-outdoor flow that modern homeowners crave. Victorian and Colonial homes were inward-facing; the backyard was for laundry and livestock, not entertaining. As a result, many historic renovations involve adding a deck or patio to bridge the gap between the kitchen and the garden.
However, bolting a pressure-treated lumber deck onto the back of an 1890s Queen Anne can look jarring and cheap. It requires a sensitive design approach and a builder who respects the existing architecture.
Sympathetic Design and Construction
When planning an outdoor extension, hire a specialist in deck installation who understands traditional joinery and materials. A specialist will know how to attach the ledger board to the house without trapping water against the historic siding—a common cause of rot in renovation projects. They will also be versed in materials that mimic the look of traditional painted porches, such as high-end PVC or hardwoods like Ipe and Mahogany, rather than standard knotty pine. The design should echo the details of the house, inside and out. For instance, if you are opening up a back wall to access the new outdoor space, utilizing arch kits can help you replicate the original curved entryways of the home, ensuring the new transition feels authentic rather than starkly modern. A skilled installer can create a transition that feels like it has always been there, providing the modern amenity of outdoor living while respecting the historic integrity of the façade.
The design should echo the details of the house. If the house has heavy cornices and turned spindles, the deck railing should match, rather than using generic big-box store balusters. A skilled installer can create a transition that feels like it has always been there, providing the modern amenity of outdoor living while respecting the historic integrity of the façade.
Design Tips for Historic Decks:
- Skirt the Perimeter: hide the under-structure with lattice or stone to ground the deck.
- Scale Matters: Ensure the size of the deck doesn’t overwhelm the rear elevation.
- Railings are Key: The railing profile is the most visible element; make sure it matches the period style.
Conclusion
Renovating a historic home is a journey that tests your patience, your budget, and your problem-solving skills. It is easy to get overwhelmed by the sheer scope of work required to bring an old structure up to modern standards of safety and comfort. However, by breaking the project down into these specialized categories and hiring the right experts for each task, you transform an insurmountable mountain into a series of manageable hills.
The difference between a renovation that feels like a “money pit” and one that results in a masterpiece lies in the team you assemble. When you value the specific expertise of tradespeople—from the environmental testers who ensure your safety to the artisans who restore your stained glass—you are doing more than just fixing a house. You are acting as a steward for history. You are ensuring that the craftsmanship of the past is preserved, functional, and beautiful for generations to come. So, take the time to vet your contractors, ask the hard questions, and invest in the specialists. Your home deserves nothing less.